This post may contain affiliate links. Please read our disclosure policy.
Seriously The Best Elderberry Syrup Recipe that you can make at home on the stove top for cold/flu season. Minimal ingredients and steps to prepare and honestly, it doesn’t taste that bad!

Now is the time to mention, that I make this syrup every year when flu season hits.
I was first introduced to it when my son turned one.
When I stopped breastfeeding him and he was starting to get colds almost every week.
Then I decided to do some research and found out that all moms gave their little ones elderberry syrup from the store.
I got a bottle, but at first my son didn’t want it at all. After all, I decided to taste it and it did not taste that pleasant.
Thick, sweet, but musky and I could still taste some bitterness. Not good!
Then I tried making a homemade version of this syrup from dried elderberries.
After some trial and error, I got to a point, where I do like the taste and thickness of this immune booster and I’m more that happy to share the recipe with you.
Elderberry Syrup:
What really is elderberry syrup?
Does Elderberry Syrup work?
Do you need to look for the best elderberry syrup recipe on the web or waste time and spend money making it or even go for the pricier option – purchase a bottle from the store.
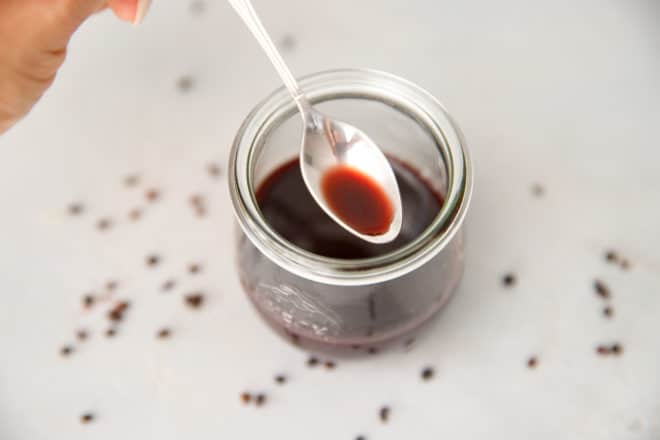
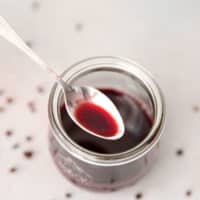
Elderberry syrup is made by boiling (cooking ) elderberries with water to extract its juice and get a hold of their good properties in the form of a syrup. Then sweetener is added.
It is very important, that this homemade syrup is prepared properly.
Elderberry syrup is shown to reduce cold and flu symptoms (source -Pubmed ).
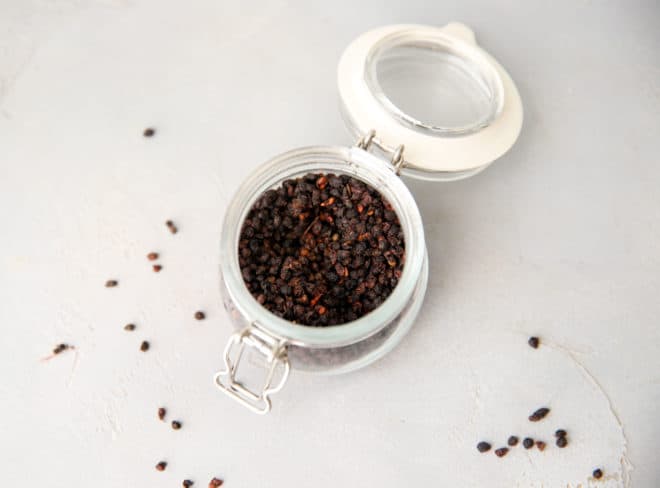
Dried elderberries
They are rich in antioxidants, vitamin C, shown to lower blood sugar, because they can stimulate glucose metabolism ( source Pubmed ).
Dried elderberries contain a toxin, which is deactivated by cooking them. This makes them safe in the form of Elderberry Syrup.
Other studies suggest that dried elderberries may have antimicrobial and anti-inflammatory properties (source), and even anti-depressant potential (source).
Where can you find dried elderberries?
In the USA, I was only able to order these online.
And often times they were unavailable for weeks during flu season.
This year I’m in Europe and most Health Food Stores has them, which is very convenient.
Ingredients:
- Dried elderberries (not fresh)
- Water (filtered)
- Sweetener (sugar, maple syrup, Agave nectar or even low-carb sweetener)
- Cinnamon (optional)
- Dried ginger (optional, for flavor)
- Lemon zest (if you plan on storing it in the fridge and consuming it asap).
Steps to make The Best Elderberry Syrup Recipe:
- In a saucepan combine the dried elderberries and water.
- Bring to a boil, then reduce the heat and simmer for 10 minutes, or until the liquid has reduced by half.
- Turn the heat off and mash the elderberries with a spatula/potato masher.
- Strain into a container.
- Add the sweetener, cinnamon, ginger and lemon zest (optional).
What kind of sweetener to use:
You have a few sweetener options here and it is up to you.
The most common sweetener used is regular white sugar. It will sweeten the syrup very well, it is widely available and probably won’t do too much harm, considering you only take a tablespoon or two of this Elderberry syrup a day.
While sugar is a good preservative and your homemade elderberry syrup is very unlikely to go bad, it is not my best option.
I usually use Agave Nectar. Maple syrup could be also used. Low-carb sweeteners will work, but they may crystalize on the bottom of the jar with cooked syrup.
I do keep my syrup in the fridge.
How about honey? Yes, honey could be used. I suggest using good quality organic honey “the real deal” from the Farmer’s Marker, not the one from the store. I’m sure you can taste the difference.
If using honey, maple syrup and even Agave nectar, storing the syrup in the refrigerator is mandatory. It will go bad and moldy in the matter of days.
When using sugar, you can store in at room temperature (75 F) for up to 1 month.
Can you make it in the Instant Pot?
You sure can make this elderberry syrup recipe in the Instant Pot. There are some important notes, if you decide to do so.
This is a “small batch” recipe, intended to be made on the stove top. It boils and thickens super fast.
Not that the Instant Pot won’t cook it fast, but it is not worth using it for such a small amount. It most likely will evaporate the liquid while building pressure and you get the “BURN” sign.
The most important thing is to increase the amount of ingredients – by x3 or x4 times, to make sure it cooks properly and justify the use of your pressure cooker. I’d also reduce the water, since you do get more evaporation with the stove top method.
The ingredients will be:
- 1 cup dried elderberries
- 4 cups water
- 3/4 to 1 cup sweetener, added after cooking
Directions for the Instant Pot method:
- Combine the elderberries and water in the instant pot.
- Close the lid and set the valve to seal.
- Select 15 min Manual High Pressure.
- Release the pressure naturally.
- Open the instant pot. If the syrup appears still thin, turn to sautee and thicken it a little. Be careful not to get it too thick and try to prevent splashes.
- Turn the heat off.
- Add the sweetener (if it is raw honey, wait until the syrup is room temperature to add).
Can you give it to children?
Before you do it, make sure your child doesn’t have any allergies and please consult with your doctor.
The best elderberry syrup recipe could be made and given to children over 1 year old. Again check with your medical professional for both children and adults.
How to store homemade Elderberry syrup?
I like to make my elderberry syrup, following this homemade recipe, I usually make it often in small badges.
We usually take it for 1 month, then take a break. I don’t take it all winter long.
Store in an air-tight container (bottle or a jar) in the fridge for up to 2 months. If your syrup is made with regular white sugar, you may be able to store it at room temperature 75 F for up to 1 month.
More immune boosting recipes:
- An amazing combination of flavors that makes this healthy Turmeric Papaya Smoothie super delicious.
- Antioxidant and vitamin rich Acai Berry Smoothie Bowl.
- Sugar free ginger lemonade. This ginger loaded drink has antioxidant and anti-inflammatory properties and may also improve digestion.
The Best Elderberry Syrup Recipe
Video
Ingredients
- 1/4 cup Dried elderberries
- 1 1/4 cup water
- 3-4 tablespoons sweetener -sugar, honey or agave nectar
- Optional: pinch of cinnamon
- 1/8 tsp dried ginger
- 1/4 tsp lemon zest, * Definitely refrigerate, if using lemon zest.
Instructions
- In a saucepan combine the dried elderberries and water. Bring to a boil, then reduce the heat and simmer for 10 minutes, or until the liquid has reduced by half.
- Turn the heat off and mash the elderberries with a spatula (press towards the bottom and walls of the saucepan, to extract the juice).
- Strain into a container. Add the sweetener, cinnamon, ginger and lemon zest (optional).
Nutrition
Nutrition information is automatically calculated, so should only be used as an approximation.


Awesome !