This post may contain affiliate links. Please read our disclosure policy.
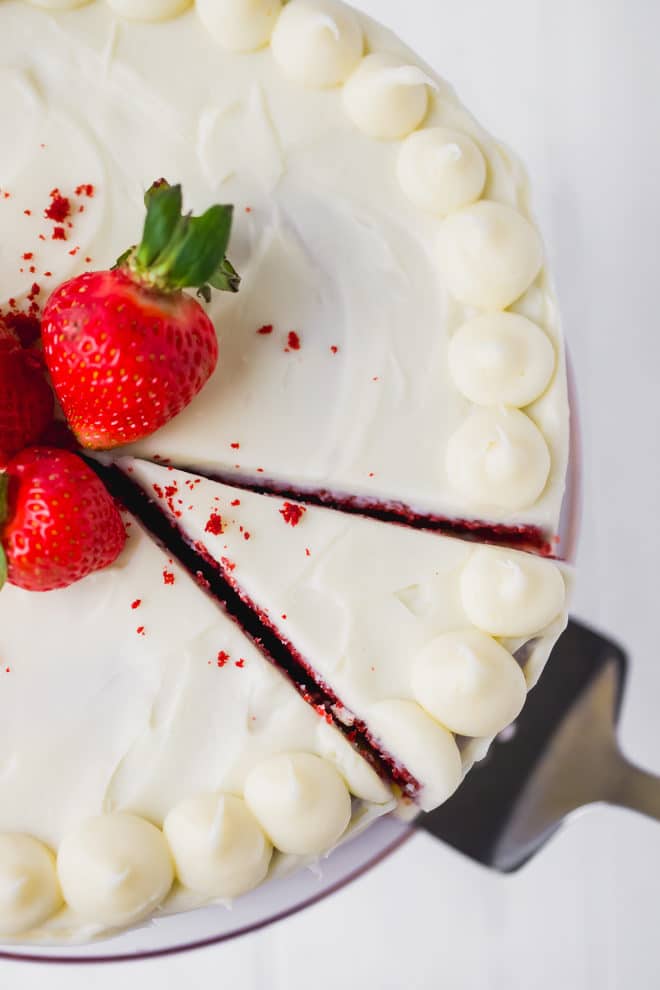
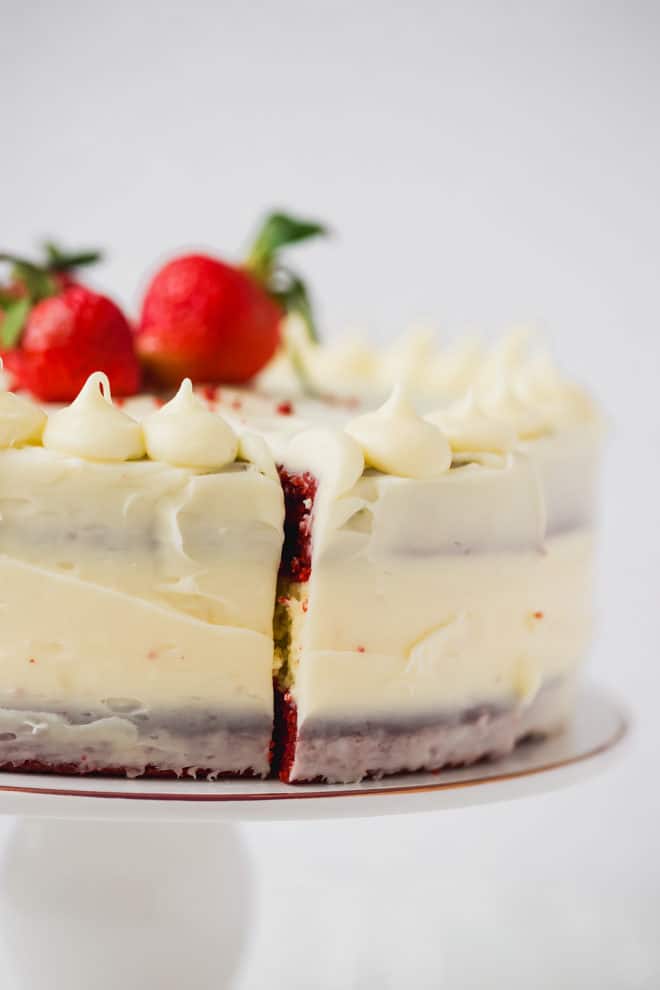
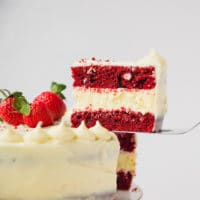
Red Velvet Cheesecake Cake Recipe – beautiful, fun to make and delicious! Perfect for any celebration. Two layers of moist red velvet cake with luscious cheesecake layer in between.This beautiful rich red velvet cheesecake cake combines two favorites of mine Red Velvet and Cheesecake. Covered in creamy cream cheese frosting. Topped with strawberries.

Have you tried Cheesecake Factory’s Red Velvet Cheesecake Cake? It is pretty good. I also have a local restaurant that makes a good Red Velvet Cheesecake Cake, but I really wanted to make my own.
Original Red Velvet Cheesecake Cake Recipe was posted on this blog in July of 2014. Recipe and photos updated in February 2019. Almost 5 years ago!
What ingredients do I need to make Red Velvet Cheesecake Cake?
Full amounts of all ingredients in the recipe card below.
For the cheesecake layer:
- cream cheese
- sugar
- vanilla extract
- sour cream or Greek yogurt
- heavy cream
- eggs
For the red velvet cake layers:
- flour
- salt (I like to use Pink Himalayan salt)
- cocoa powder
- baking soda
- eggs
- vanilla
- buttermilk
- vegetable oil
- liquid red food coloring
For the cream cheese frosting:
- butter
- cream cheese
- vanilla extract
- powder sugar

How to make this Red Velvet Cheesecake Cake Recipe?
To Make The Cheesecake layer:
-
Prepare a 9″ spring form pan (or a cake pan with removable bottom), line parchment paper on the bottom, and spray it with oil.
-
With an electric mixer, beat cream cheese until smooth. Add sugar and mix for 3-4 minutes, until combined. Scrape gown the sides of bowl, to make sure all cream cheese is incorporated. Then add sour cream, heavy cream and vanilla. Mix until combined. Add eggs, one at a time, beat until incorporated. Pour batter into the cheesecake pan.
-
Place pan on the upper rack of the oven and bake for 45 minutes, until the top is set. Transfer cheesecake to a cooling rack and let it cool down completely, without opening the sides of the springform. When completely cool, freeze for at least 2 hours or overnight. The frozen cheesecake layer is easier to use when assembling the cake.
Red Velvet Cake Layers:
Preheat oven to 350 F.
-
Prepare 2 9″ cake pans and spray them with baking spray. In a large bowl combine all dry ingredients: flour, sugar, salt, cocoa powder and baking soda and give mixture a stir.
-
Add eggs, buttermilk, oil and food coloring and mix for 2-3 minutes on medium speed until blended. Scrape the sides of the bowl with a spatula if needed. Spread batter into cake pans, dividing the amount equally. Bake for 35 minutes, until toothpick inserted comes out clean. Take out of the oven and let them cool for 15 minutes. Remove cake layers from pans and set on a cooling rack to cool down completely.
Cream Cheese Frosting:
All ingredients should be at room temperature. Combine cream cheese, butter, powdered sugar and vanilla in a bowl. Mix until creamy and smooth, but do not overheat.
To assemble and frost the cake:
Place 1 red velvet cake layer onto the bottom of a cake stand (cake plate) and add frozen cheesecake over it. If cheesecake layer is slightly larger, shave off some of the sides of it to make them the same size. Add the other cake layer on top. Using a long and thin spatula apply a thin coat of frosting to the cake. Make sure you wipe off cake crumbs of the spatula, so they don’t transfer to the bowl of icing. Refrigerate for 30 minutes. Then add a second, thicker layer of cream cheese frosting to the cake, spreading it evenly. Decorate cake with a piping bag or some chocolate shavings. I used white chocolate shavings for mine. Keep cake in the fridge.
-
If cheesecake layer is slightly larger, shave off some of the sides of it to make them the same size.
-
Add the other cake layer on top. Using a long and thin spatula apply a thin coat of frosting to the cake. Make sure you wipe off cake crumbs of the spatula, so they don’t transfer to the bowl of icing. Refrigerate for 30 minutes.
-
Then add a second, thicker layer of cream cheese frosting to the cake, spreading it evenly. Decorate cake with a piping bag , fresh berries or some chocolate shavings. I used to decorate mine with white chocolate shavings. Now I only added strawberries. Keep cake in the fridge.
How to make moist red velvet cake?
It is very easy to over bake a cake. Moist cakes are my favorite.
I’ve baked quite a few red velvet cakes and tested recipes.
Here are some tips to make the perfect moist red velvet cake layers:
- Sift the flour
- Use buttermilk (makes the cake moist)
- I recommend that you use oil in order to produce crumby and soft cake, instead of butter, that makes tough, dense cakes.
- Do not over mix the batter. Beat until the dry and wet ingredients are just combined.
- It is important that you preheat the oven for at least 20 minutes, before you place the cake pans for baking. Do not over bake the cake. Bake until toothpick inserted comes out clean.
Do you need to bake the cheesecake layer in a water bath?
The short answer is no. But if you’d like a fluffier, softer and moister cheesecake, go ahead and bake it in a water bath.
I believe that the whole water bath set up is extra work that is not workt it, if you bake the cheesecake at 300-325 F and don’t bake it for a very long periods of time.
Sometimes my springform pans leak and it causes extra frustration and waste of ingredients.
How to decorate this Easy Red Velvet Cheesecake Cake?
You can use a piping bag with a tip of your choice to decorate the cake.
Even if you leave it plain, just covered in cream cheese frosting, it will still look beautiful. The frosting does not need to be smooth.
Top with fresh berries of your choice.
You can also reserve some red velvet cake crumbs from the cake layers (when you trim the domes) and sprinkle the crumbs on top of the cake.
More Red Velvet Recipes:
The slices of cake are nice and tall, and with the softened cheesecake and frosting it is very moist and fluffy. This cake is perfect for any holiday and I’m definitely making it for Valentine’s Day this year.
Red Velvet Cheesecake Cake
Video
Ingredients
Cheesecake:
- 2 8 oz packages cream cheese at room temperature
- 1/2 cup sugar
- 2 eggs
- 1/8 tsp salt
- 1/3 cup sour cream
- 1/3 cup heavy cream
- 1 tsp vanilla
Red Velvet Cake:
- 2 1/2 cups flour, (sifted)
- 1 1/2 cup sugar
- 3 tbsp unsweetened cocoa powder
- 3 tbsp red food coloring (liquid)
- 1 1/2 tsp baking soda
- 1 tsp vanilla
- 2 tsp red wine vinegar
- 1 tsp salt
- 2 eggs at room temperature
- 1 1/2 cup vegetable oil
- 1 cup buttermilk, (can make buttermilk substitute by combining 1 tbsp lemon juice and 1 cup milk)
Cream Cheese Frosting:
- 2 1/2 cups powdered sugar, (sifted)
- 1 1/2 (8oz) packages softened cream cheese
- 1 8 oz pack softened butter
- 1 tsp vanilla extract
Instructions
To Make The Cheesecake layer:
- Prepare a 9″ spring form pan (or a cake pan with removable bottom), line parchment paper on the bottom, and spray it with oil.
- With an electric mixer, beat cream cheese until smooth. Add sugar and mix for 3-4 minutes, until combined. Scrape gown the sides of bowl, to make sure all cream cheese is incorporated. Then add sour cream, heavy cream and vanilla. Mix until combined. Add eggs, one at a time, beat until incorporated. Pour batter into the cheesecake pan.
- Place pan on the upper rack of the oven and bake for 45 minutes at 325 F, until the top is set. Transfer cheesecake to a cooling rack and let it cool down completely, without opening the sides of the springform. When completely cool, freeze for at least 2 hours or overnight. The frozen cheesecake layer is easier to use when assembling the cake.
Red Velvet Cake Layers:
Preheat oven to 350 F.
- Prepare 2 9″ cake pans and spray them with baking spray. In a large bowl combine all dry ingredients: flour, sugar, salt, cocoa powder and baking soda and give mixture a stir.
- Add eggs, buttermilk, oil and food coloring and mix for 2-3 minutes on medium speed until blended. Scrape the sides of the bowl with a spatula if needed. Spread batter into cake pans, dividing the amount equally. Bake for 35 minutes, until toothpick inserted comes out clean. Take out of the oven and let them cool for 15 minutes. Remove cake layers from pans and set on a cooling rack to cool down completely.
Cream Cheese Frosting:
All ingredients should be at room temperature. Combine cream cheese, butter, powdered sugar and vanilla in a bowl. Mix until creamy and smooth, but do not overheat.
To assemble and frost the cake:
Place 1 red velvet cake layer onto the bottom of a cake stand (cake plate) and add frozen cheesecake over it. If cheesecake layer is slightly larger, shave off some of the sides of it to make them the same size. Add the other cake layer on top. Using a long and thin spatula apply a thin coat of frosting to the cake. Make sure you wipe off cake crumbs of the spatula, so they don’t transfer to the bowl of icing. Refrigerate for 30 minutes. Then add a second, thicker layer of cream cheese frosting to the cake, spreading it evenly. Decorate cake with a piping bag or some chocolate shavings. I used white chocolate shavings for mine. Keep cake in the fridge.
- If cheesecake layer is slightly larger, shave off some of the sides of it to make them the same size.
- Add the other cake layer on top. Using a long and thin spatula apply a thin coat of frosting to the cake. Make sure you wipe off cake crumbs of the spatula, so they don’t transfer to the bowl of icing. Refrigerate for 30 minutes.
- Then add a second, thicker layer of cream cheese frosting to the cake, spreading it evenly. Decorate cake with a piping bag , fresh berries or some chocolate shavings. I used to decorate mine with white chocolate shavings. Now I only added strawberries. Keep cake in the fridge.
Nutrition
Nutrition information is automatically calculated, so should only be used as an approximation.


This cake is very delicious! Thanks for the recipe!
Hi; is there any edits we’d have to make if we do this in a cupcake form?
Hi, honestly I’ve never tried it so I don’t really know. I do have a red velvet cupcake recipe, which is pretty good. You can find it here: https://cookinglsl.com/red-velvet-cupcakes/
Hi – the recipe doesn’t specify the temperature to bake the cheesecake layer at. The only comment is to bake at 300-325 with ambit that’s in the comment about baking in water.
So sorry, it is 325 F for the cheesecake layer.
This recipe was definitely a hit with my family!!! I was super sick when I baked this cake. So sick I even left the vanilla out of my red velvet cake!? But it still came out very delicious and beautiful! Thank you! My birthday boy was very happy!!!! ❤️